GigaPaw.com participates in affiliate programs including Amazon Associates. We earn from qualifying purchases. Content is for informational purposes only—consult a licensed veterinarian for pet medical advice.
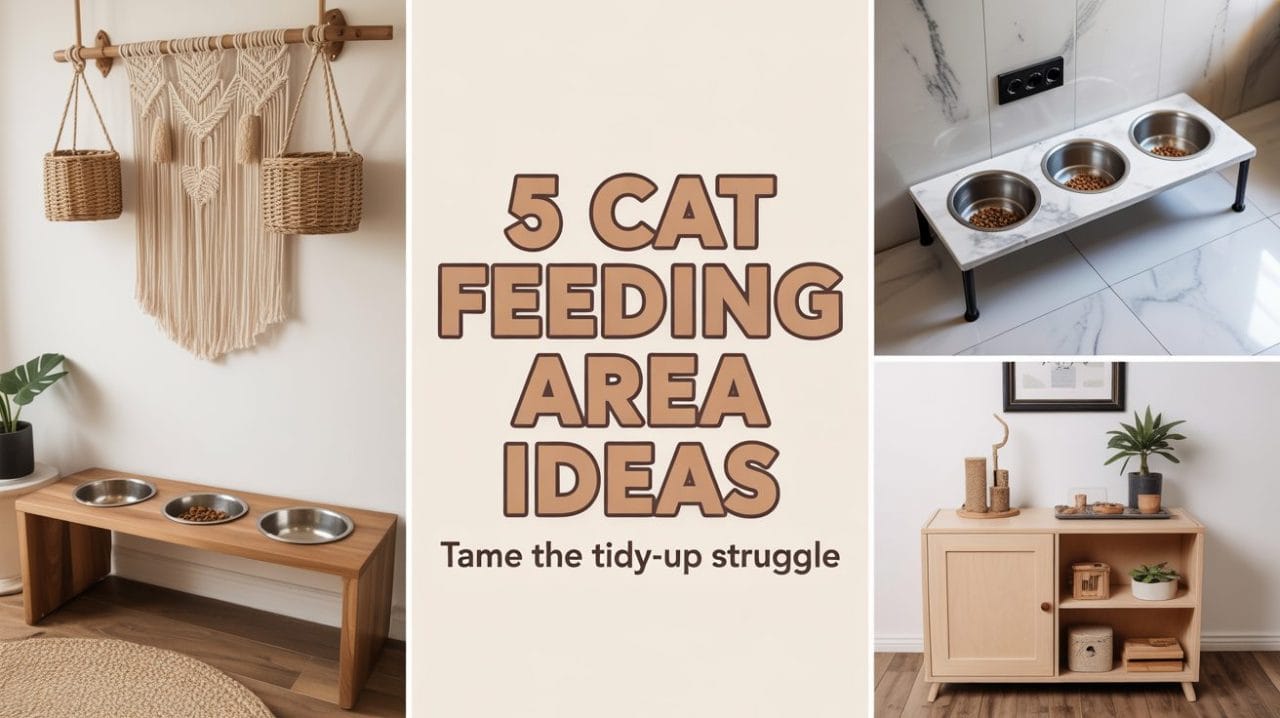
5 Cat Feeding Area Ideas That’ll Finally End the Mealtime Mess
If your cat eats like royalty but leaves the kitchen looking like a crime scene, you’re not alone. Scattered kibble, tipped-over bowls, water everywhere—feeding time turns into cleanup time real quick.
And no, yelling “Stop it!” doesn’t work. I’ve tried.
But here’s the thing: the mess isn’t just annoying. It can attract ants, soak your floors, and frankly, ruin the vibe of an otherwise clean space.
A better cat feeding setup can fix all of that. I’m not talking about fancy gadgets or overpriced bowls with Bluetooth (yes, that’s a thing). I mean simple, smart changes that actually work.
Let me show you five feeding area ideas that’ll keep the mess under control, make your cat happy, and give you one less thing to clean every day.
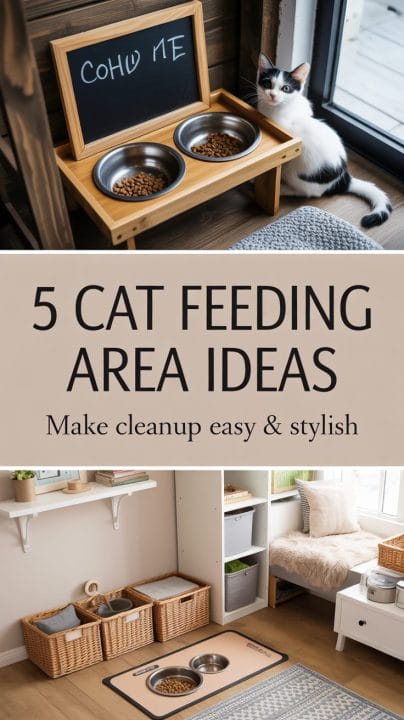
5 Clever Cat Feeding Area Ideas
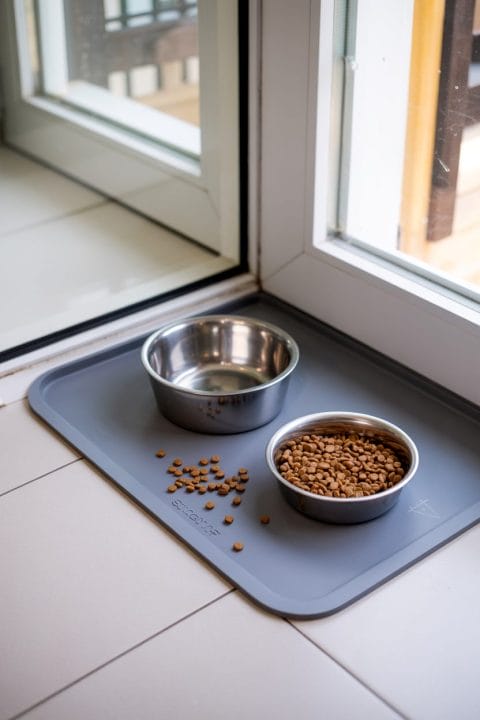
1. Create a Dedicated Feeding Mat Zone
Why it works:
It keeps food and water spills from reaching your floor. Easier to clean. Looks tidy.
Steps to follow:
- Pick a non-slip feeding mat. Silicone ones are great—they’re waterproof and grip the floor.
- Choose a flat area, preferably in a corner, near a wall to minimize distractions while eating.
- Place the mat down and center the food and water bowls on it.
- After meals, wipe the mat if there are spills. Do a deep clean once a week.
Bonus tip: Get a mat with raised edges to trap water or food spills.
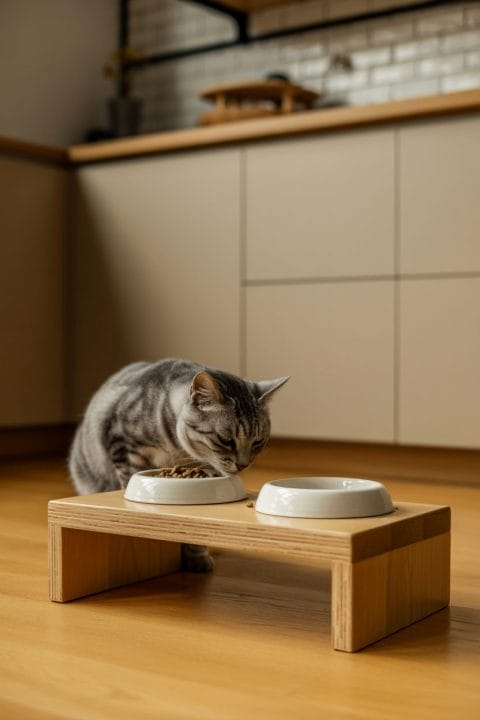
2. Try a Raised Bowl Stand
Why it works:
Better posture for your cat. Less strain on their neck. Less likely to push food out of the bowl.
Steps to follow:
- Measure your cat’s height while sitting. Choose a raised stand that brings the bowl to chest level.
- You can buy a wooden or metal stand or DIY one using stacked books or boxes (make sure it’s stable).
- Place bowls in the stand, ensuring they fit snugly and won’t rattle or tip.
- Observe how your cat eats with it—some may take a day or two to adjust.
Bonus tip: Raised bowls are especially helpful for older or arthritic cats.
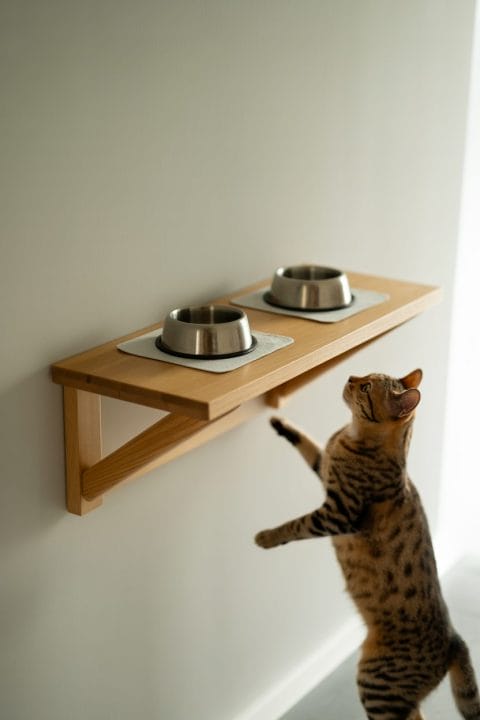
3. Build a Wall-Mounted Feeding Shelf
Why it works:
Saves floor space. Keeps dogs or toddlers out of the cat’s food. Looks neat.
Steps to follow:
- Pick a quiet wall that’s out of the way but easy for your cat to access.
- Install a small floating shelf—wide enough to hold two bowls. Make sure it’s sturdy and level.
- Add a small mat or rubber grip liner on the shelf to prevent bowls from sliding.
- Place food and water bowls. Observe your cat for a few days to make sure they feel comfortable jumping up.
Bonus tip: If your cat is older, add a small step or ramp to help them climb up.
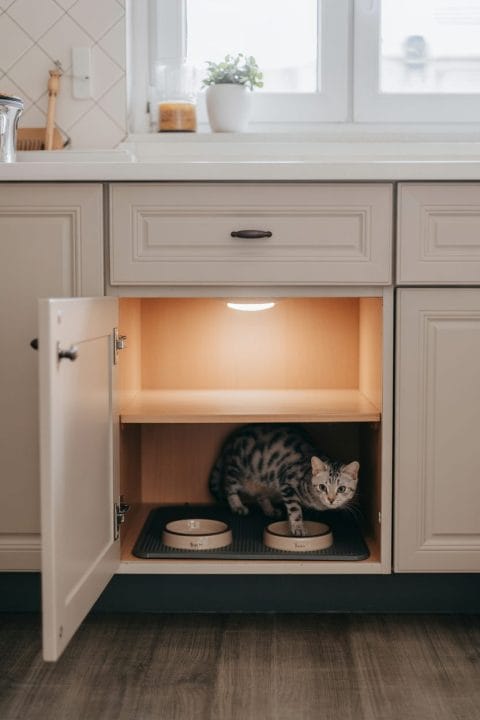
4. Make a Feeding Station Inside a Cabinet
Why it works:
Hides bowls when not in use. Helps keep things visually clean and pet-friendly.
Steps to follow:
- Choose a lower kitchen cabinet or an unused part of a built-in shelf.
- Remove the door if needed, or install a cat flap so they can enter on their own.
- Add a mat inside and place the bowls.
- You can add small lights (battery-operated) if the space is dark.
- Train your cat by putting treats or food inside for a few days until they get used to it.
Bonus tip: If you have a robot vacuum, it won’t knock over the bowls inside a cabinet.
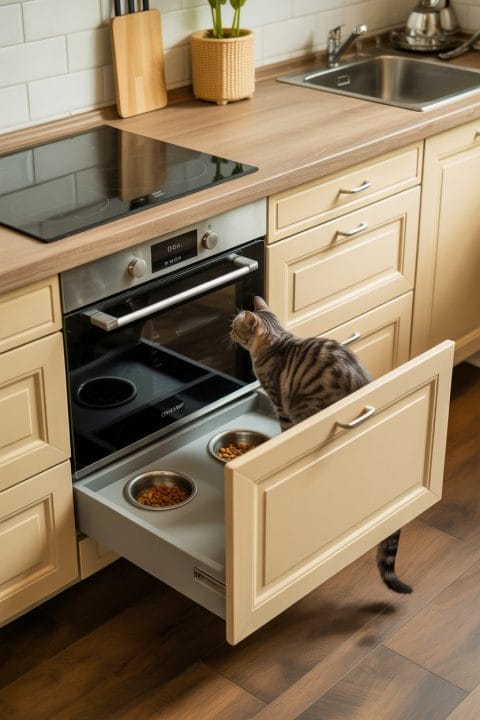
5. Sliding Drawer Feeding Station
Why it works:
You can hide it when it’s not in use. It keeps things clean, saves space, and looks sleek.
Steps to follow:
- Choose a bottom kitchen drawer or cabinet near where you want the feeding area.
- Install a shallow pull-out tray or use an existing drawer if it’s wide enough.
- Add a waterproof liner or thin silicone mat inside to prevent spills.
- Place low-profile bowls that won’t shift when opening or closing.
- After mealtime, simply slide the drawer shut. No mess, no clutter in sight.
Bonus tip: If you don’t want to modify kitchen drawers, use a repurposed rolling under-bed drawer and push it under a console table.