GigaPaw.com participates in affiliate programs including Amazon Associates. We earn from qualifying purchases. Content is for informational purposes only—consult a licensed veterinarian for pet medical advice.
9 Cat-Proof Fence Ideas to Keep Your Cat Safe in the Yard
You built the fence. You felt good about it.
Then you looked out the window and watched your cat scale six feet of solid wood like it was a carpeted ramp.
Here’s the thing nobody warns you about: a regular fence is basically a suggestion to a cat. Most cats can clear a five to six foot jump from a standing start, and once they get a paw over the top, the rest is just gravity doing them a favor.
The good news? You don’t need to wall your yard off like a prison. You just need to take away the one thing every escape depends on: the grip and the launch.
Let’s go through nine ways to do exactly that, from cheap weekend hacks to “set it and forget it” systems.
First, Why Cats Beat Fences So Easily
Before we fix it, you should know what you’re up against.
A cat doesn’t really “jump” a fence the way a dog does. They leap partway, hook their claws into the top, and pull themselves up the rest of the way.
That means the magic isn’t fence height alone. It’s whether they can grab the top edge and whether they can get over the top once they’re up there.
Take away the grip, or make the top tip them backward, and even a champion climber gives up. Almost every idea below attacks one of those two things.
For reference, here’s what you’re working with.
| Cat ability | Rough number |
|---|---|
| Vertical jump (standing) | 5 to 6 feet |
| Recommended fence height to slow them down | At least 6 feet |
| Reach once they grip the top | Another 1 to 2 feet |
So a six-foot fence on its own? Helpful, but not a guarantee. The top is where the real work happens.
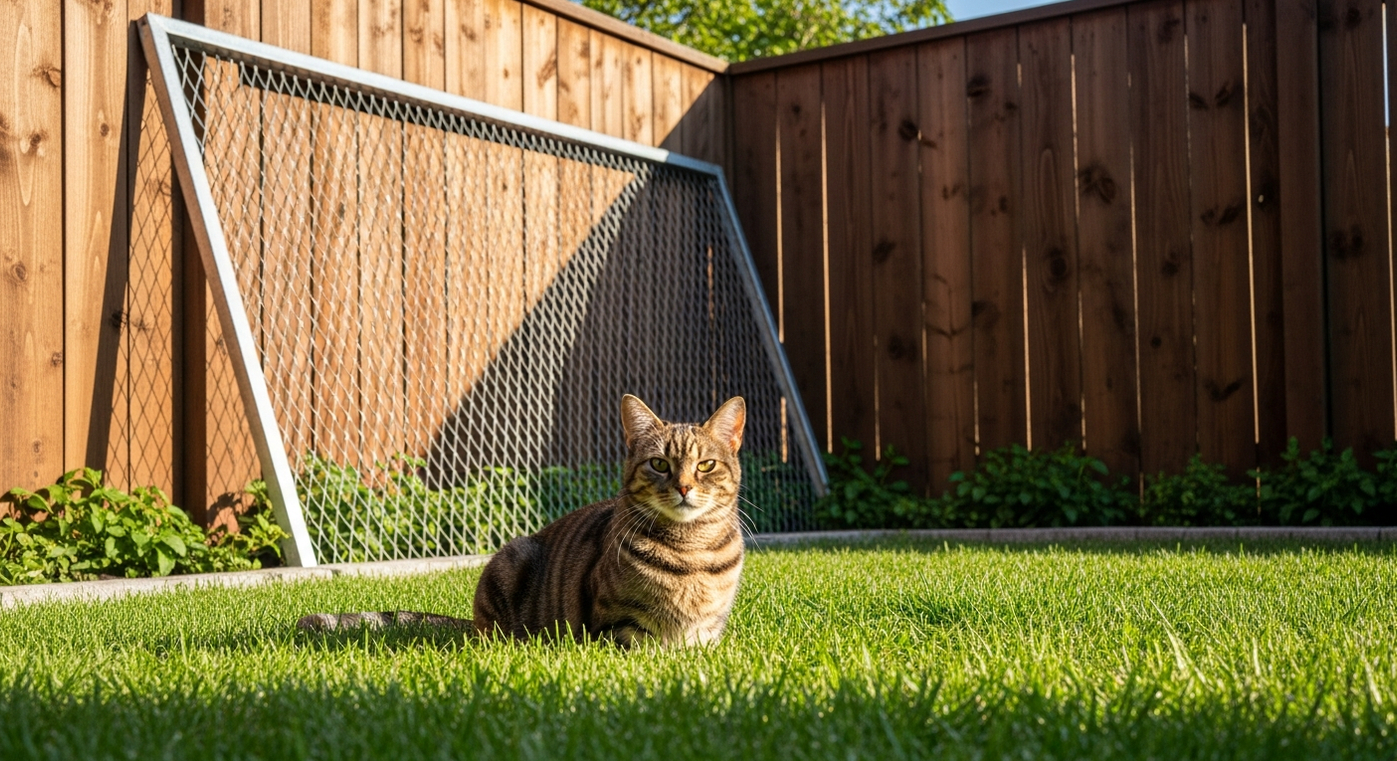
1. Add an Angled Overhang (the Classic That Just Works)
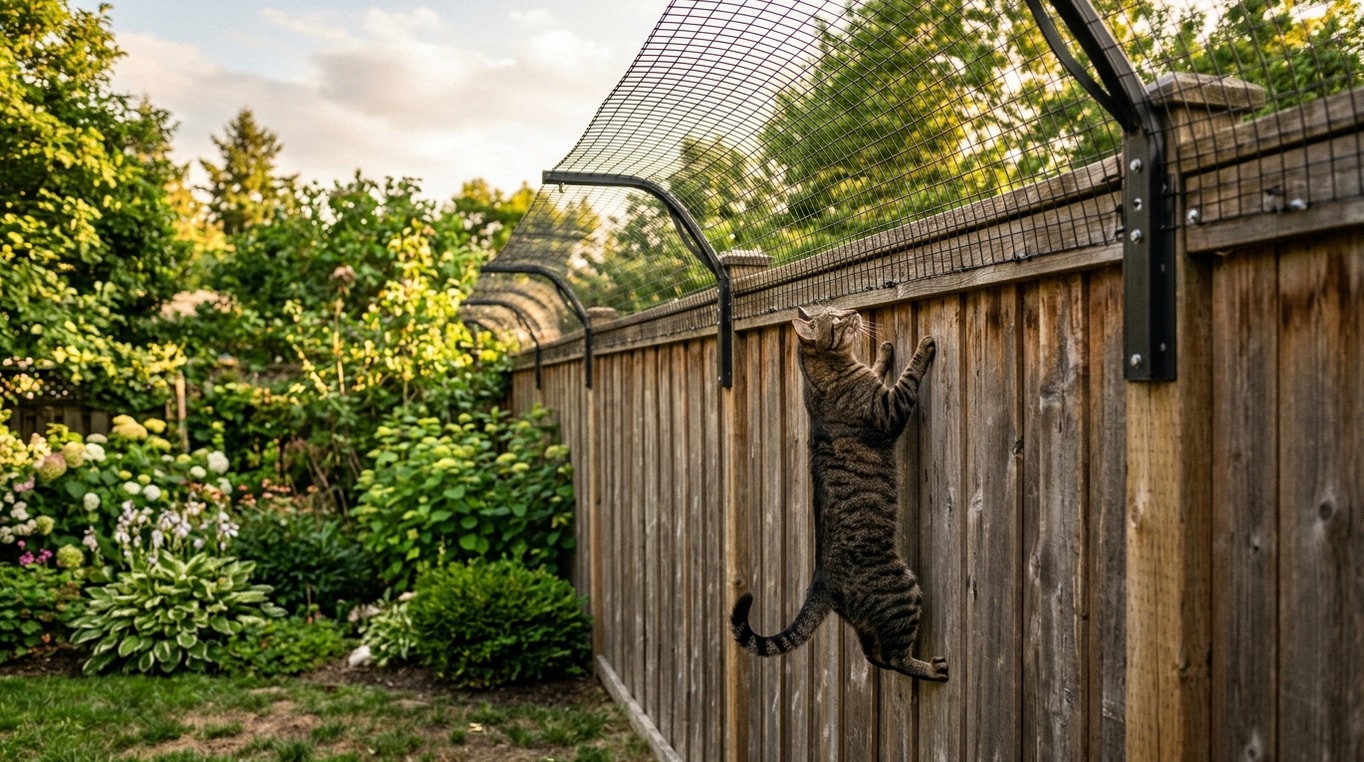
This is the gold standard, and for good reason.
You mount brackets along the top of your fence that angle inward toward your yard at around 45 degrees, then stretch mesh or wire across them.
When your cat climbs up and reaches the top, the overhang is now leaning back over their head. There’s nothing to grab and nowhere to go.
It’s a little scary for them and impossible to walk along, which is exactly what you want. An inward-facing overhang is one of the few setups that stops even the most determined climbers.
You can buy ready-made bracket kits or build your own with angle brackets and a roll of galvanized mesh. Budget a weekend and a drill.
2. Install Fence Rollers (Spinning Bars)
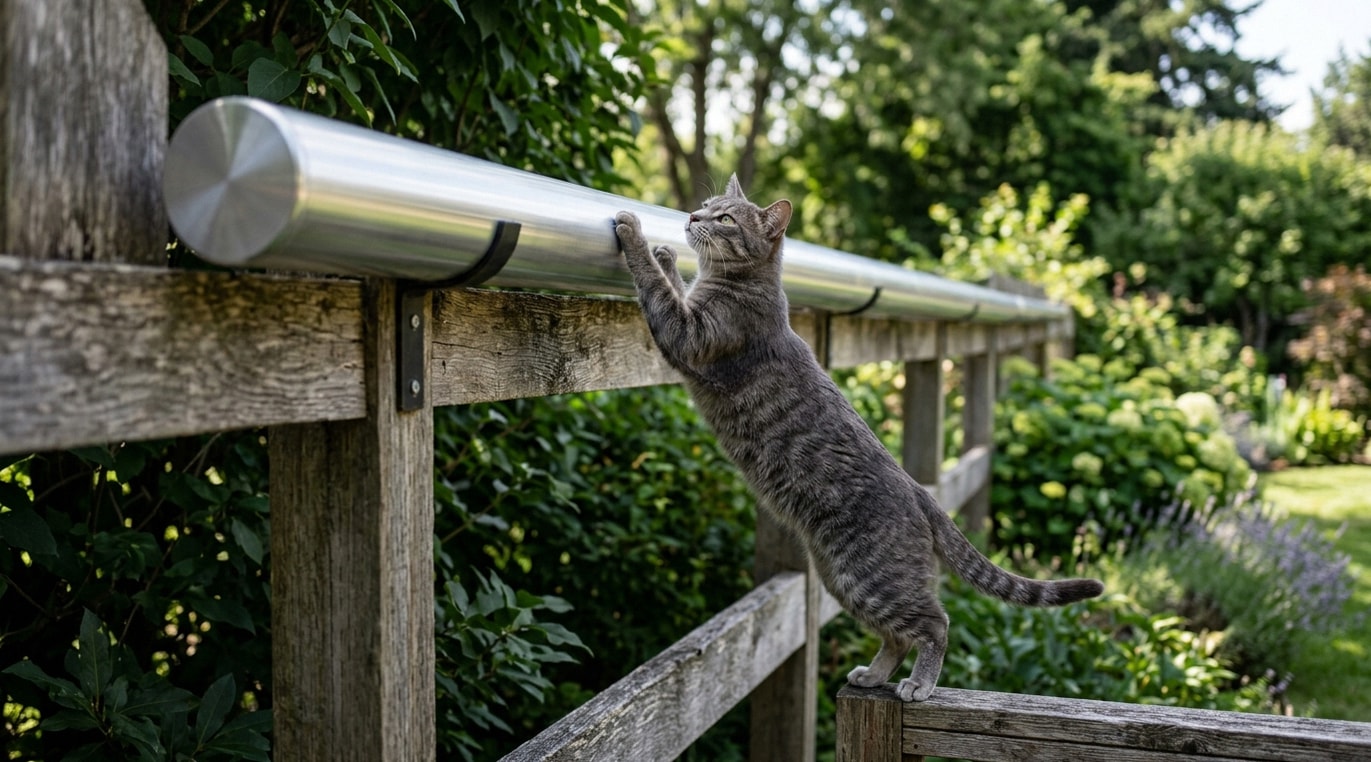
Picture a paddle wheel sitting along the top rail of your fence.
That’s a roller. When your cat tries to hook the top, the bar spins under their paw and gently dumps them back into the yard. No grip, no leverage, no escape.
Brand-name roller systems like Oscillot are the famous version, and they look clean. But you can absolutely DIY this.
The cheap version is a length of PVC pipe threaded onto a wire or rod so it spins freely, mounted with brackets along the fence top.
One honest warning: a truly athletic cat can sometimes learn to vault over a spinning bar or hang below it by their claws. Rollers are great, but pairing them with idea #1 or #3 makes them nearly bulletproof.
3. String Up Angled Cat Netting
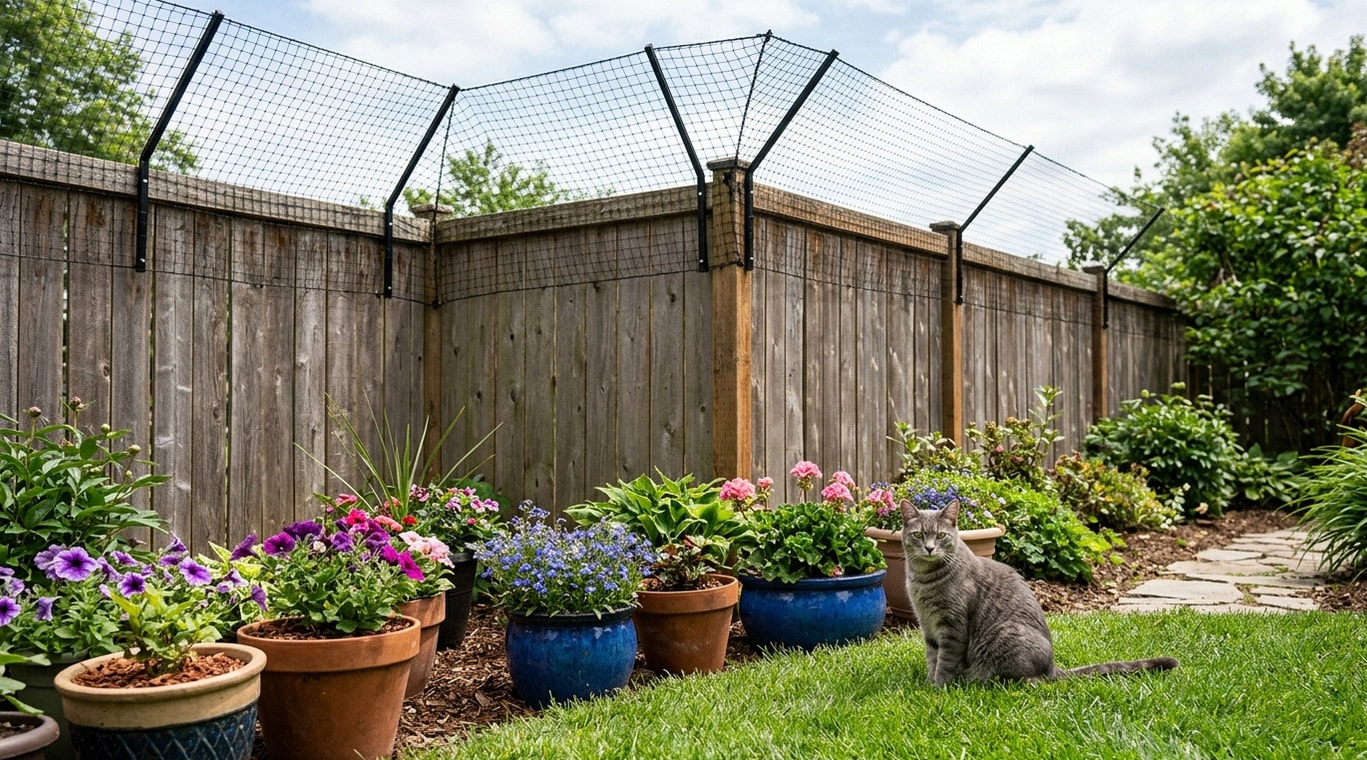
Netting is the budget-friendly cousin of the metal overhang, and it disappears from a distance.
You attach UV-resistant polypropylene netting to posts that lean inward at about 45 degrees, creating a soft barrier the cat can’t push past or climb over.
This works best when your base fence is already at least six feet tall, since the netting adds the “no way over the top” layer rather than the height itself.
It’s lightweight, weather-resistant, and forgiving on the wallet. The trade-off is that it’s not as tough as wire, so a clawed-up section may need replacing eventually.
Still, for renters or anyone who doesn’t want to drill into a nice fence, netting is a fantastic starting point.
4. Make the Fence Taller First
Sometimes the simplest fix is just more wall.
If your fence is on the short side, raising it to a solid six feet or more removes the easy standing leap before you ever touch the top.
Tall, smooth, solid panels are far harder than chain-link or lattice, which basically come with a built-in ladder of paw holds.
Height alone won’t stop a serious climber, but it raises the difficulty enough that any topper you add on next does its job with less effort.
Think of it as the foundation. The fancy stuff goes on top.
5. Clip On Fence Toppers and Extensions
Not ready for a full build? Toppers are the plug-and-play option.
These are pre-made extension brackets, often holding a mesh panel, that clamp or screw onto your existing fence and lean inward.
They give you the angled-barrier effect of idea #1 without designing anything from scratch. Many cat owners report success simply adding 12 to 18 inch inward extensions to the top of a standard fence.
You can find kits sized for wood, vinyl, and chain-link fences. Installation is usually an afternoon with basic tools.
It’s the middle ground between “buy the whole system” and “build it all yourself.”
6. Go Smooth and Remove the Grip
Cats need something to dig their claws into. So take it away.
Lining the top section of your fence with smooth material like PVC sheeting, hard plastic, or even sheet metal removes the grip cats rely on to haul themselves up.
No traction means no climb, even if they make the initial leap.
This works beautifully on fences that are otherwise climbable, like rough wood or chain-link. A slick surface near the top turns a ladder into a slide.
Pair it with a roller or overhang and you’ve covered both the grip and the launch in one go.
7. Clear Away the Launch Pads
This one costs nothing and people forget it constantly.
Your cat doesn’t need to jump the whole fence if you’ve left them a staircase. Trash bins, woodpiles, garden furniture, AC units, low sheds, and overhanging tree branches are all springboards.
Walk your fence line and look at it like a cat would. Anything within a few feet of the fence is fair game.
Move furniture and bins at least a few feet back, and trim any branches that hang over the top.
Sometimes the “great escape” was never about the fence at all. It was the patio chair you left right next to it.
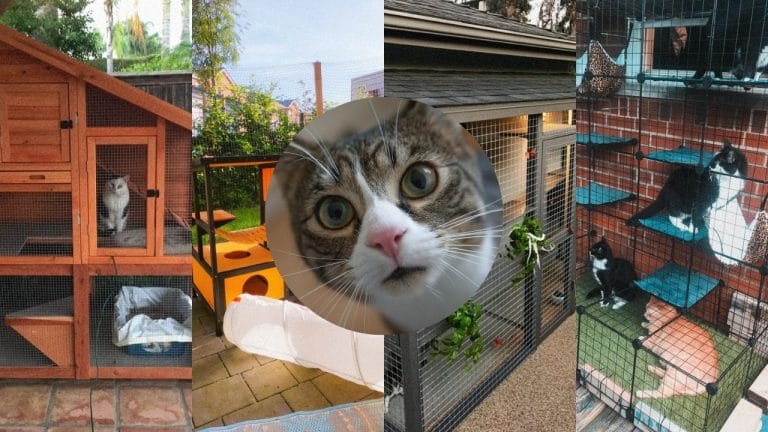
8. Turn Part of the Yard Into an Enclosure
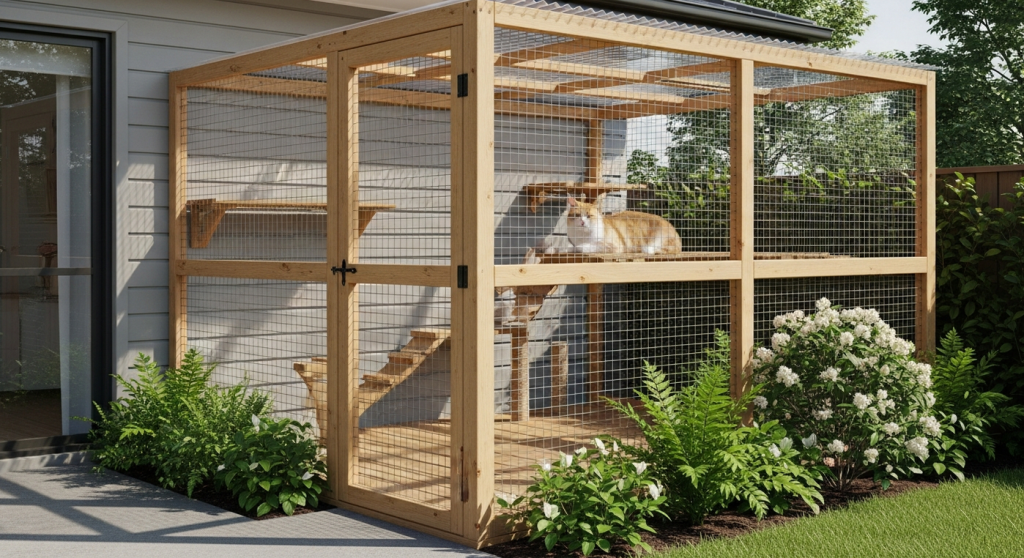
If your cat is a true escape artist and nothing on the fence is holding, stop fighting the whole perimeter.
Wall off a smaller, fully enclosed section instead. A roofed run or catio gives your cat fresh air, sunshine, and bird-watching without a single gap to exploit.
This is the most foolproof option because it removes the over-the-top route entirely. There’s a roof.
If you like this route, we’ve got a full walkthrough of DIY cat outdoor enclosure and catio ideas to get you started, plus some outdoor cat garden ideas to make the space genuinely fun.
It’s more upfront work, but you’ll never refresh your “where is the cat” panic again.
9. Install a Free-Standing Cat Fence System
Last one, and it’s for the cats who treat every other idea as a personal challenge.
Free-standing cat fence systems are purpose-built barriers, often flexible mesh on posts with a floppy, curved top that won’t support a cat’s weight.
When the cat climbs up, the top bends over and dumps them back down. They can be installed inside an existing fence or stand entirely on their own.
These are designed from the ground up to contain cats, so they tend to be the most reliable store-bought solution for serial escapees.
The catch is price and a bigger install. But for a yard full of trees and a cat with Olympic dreams, it’s money well spent.
DIY vs. Store-Bought: Quick Gut Check
Not sure where to land? Here’s the short version.
| You want… | Go with |
|---|---|
| Cheapest possible fix | DIY PVC roller or angled netting |
| Renter-friendly, no drilling | Netting or clip-on toppers |
| Clean, low-maintenance look | Brand-name roller system |
| Total escape-proofing | Catio or free-standing cat fence |
| A free first step | Clear the launch pads (#7) |
Most people get the best results by stacking two ideas: an inward angle plus a no-grip surface, for example. One barrier can be beaten. Two working together rarely are.
A Few Things to Keep in Mind
Whatever you build, walk the whole fence line and check for gaps, low spots, and dig-out points near the bottom. Cats go under as happily as over.
Give your cat a reason to stay, too. A sunny perch, some cat-safe plants, and a few hiding spots make your yard more interesting than the neighbor’s.
And if your cat is brand new to the outdoors, supervise the first few sessions. You want to see how they test the barrier before you trust it.
The Bottom Line
A cat-proof fence isn’t about building higher. It’s about killing the grip and tipping them back.
Start with the free stuff, move the launch pads, then add an angled overhang, roller, or netting on top. If your cat is a genuine Houdini, go straight for a catio or a free-standing system and skip the heartbreak.
Your cat gets fresh air and a real backyard. You get to stop scanning the neighborhood at dusk.
That’s a trade worth a weekend with a drill. Which idea are you starting with?