GigaPaw.com participates in affiliate programs including Amazon Associates. We earn from qualifying purchases. Content is for informational purposes only—consult a licensed veterinarian for pet medical advice.
Cat Quilt Wall Hanging Ideas (Mini Quilts for Your Home)
So you made a mini cat quilt. Now it’s sitting in a drawer.
That’s a crime, honestly. You spent hours fussy-cutting little kitty faces and now nobody gets to see them.
A mini quilt isn’t meant to live on a bed. It’s wall art. It’s the cozy, handmade kind of decor that makes people stop and ask, “wait, did you make that?”
The catch is that hanging one well takes a tiny bit of know-how. Hang it wrong and it sags, curls at the corners, or slides off the rod onto the floor.
So let’s fix that. Here’s how to turn a mini cat quilt into a piece you’re proud to show off.
First, What Counts as a Wall Hanging Quilt?
Basically any small quilt you’d rather display than sleep under.
We’re talking mini quilts, quilt blocks, table runners turned vertical, and those adorable 8 to 20 inch projects that are too cute to fold away.
A black cat silhouette. A row of peeking kitties. A single paper-pieced portrait of your own cat. All perfect wall candidates.
The smaller and lighter the quilt, the more hanging options you have. That’s good news, because cat mini quilts tend to be small and light.
The Best Ways to Hang a Cat Quilt
There’s no single right method. The best one depends on how permanent you want it, whether you can put holes in the wall, and how the back of your quilt looks.
Here are the five that actually work.
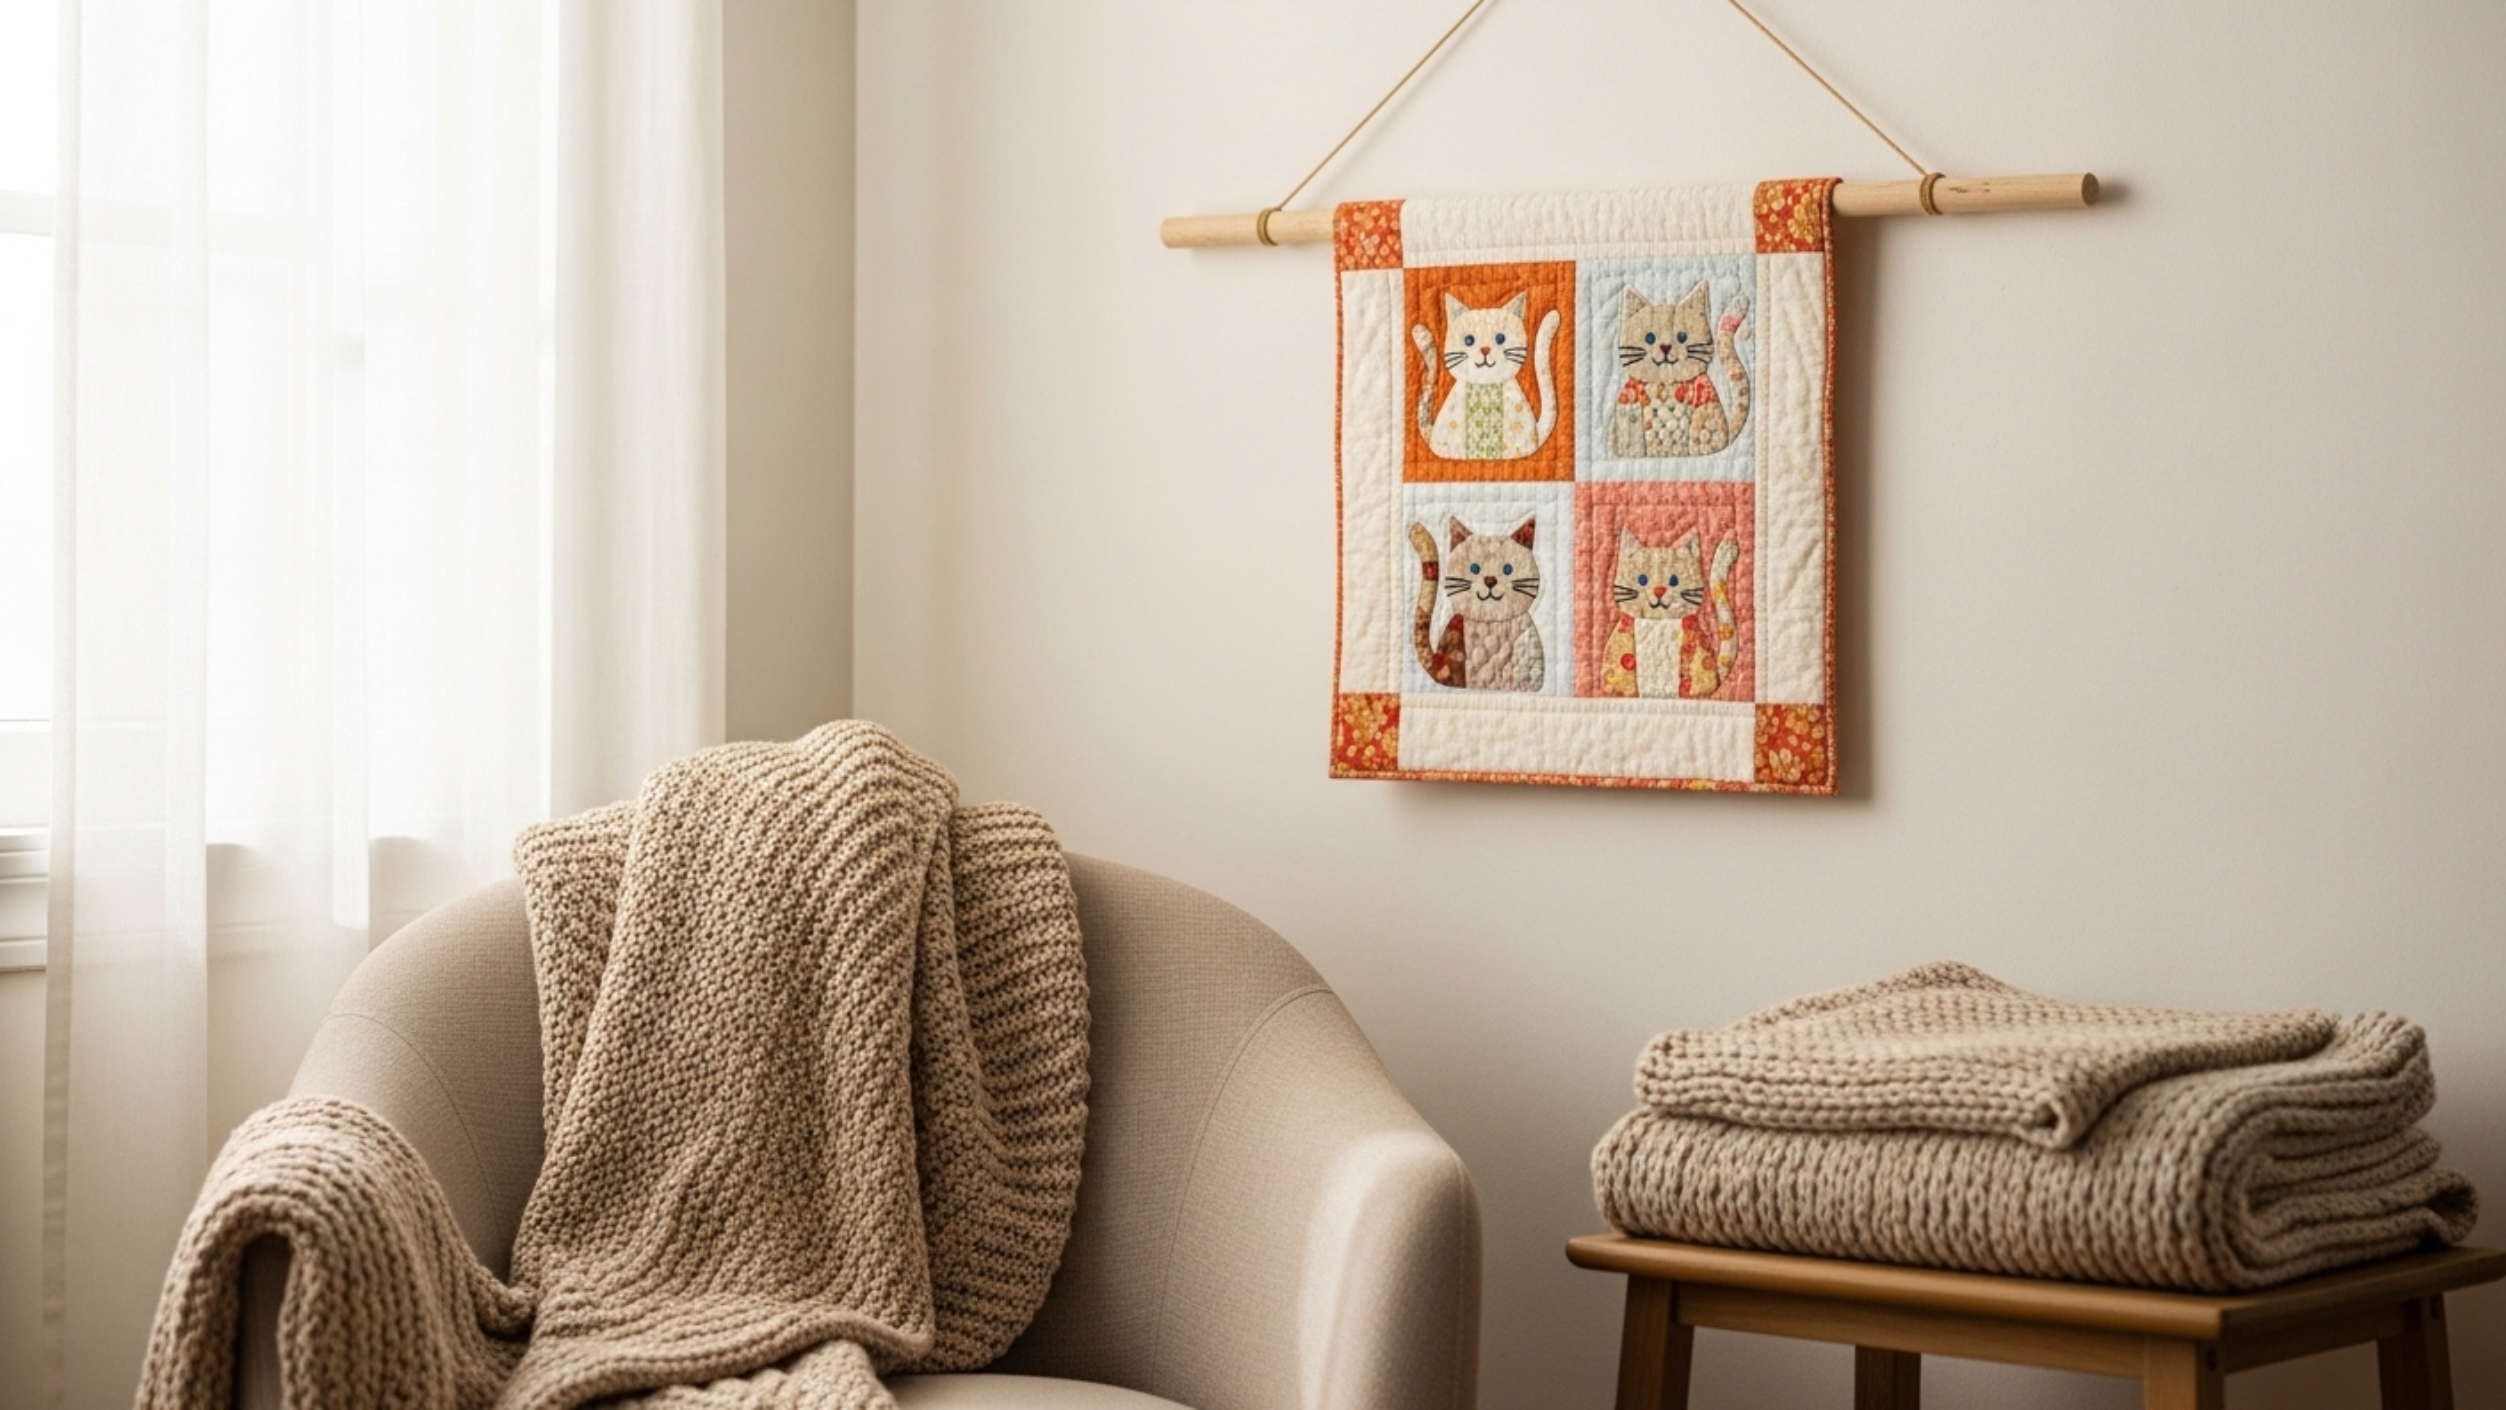
1. The Hanging Sleeve (The Classic)
This is the gold standard, and it’s what galleries and quilt shows use.
You sew a fabric tube across the back top edge of the quilt, slide a rod or dowel through it, and mount the rod to the wall.
The magic is that the sleeve is completely hidden. From the front, your quilt just floats there looking effortless.
It also spreads the weight evenly across the whole top edge, so nothing sags or puckers.
Make the sleeve a touch looser than the rod so the fabric doesn’t pull. This is the method to use if you want it to look truly finished.
2. Corner Triangle Pockets
The lazy genius option for small quilts.
You sew a triangle of fabric onto each of the two top corners, creating little pockets. Then you slide a dowel through both pockets, and hang the dowel.
It takes about five minutes and uses fabric scraps you already have.
Add two more pockets at the bottom corners and slide a second dowel through them. That bottom weight keeps the quilt hanging flat instead of curling out at you.
This is ideal for mini quilts that are too small to bother with a full sleeve.
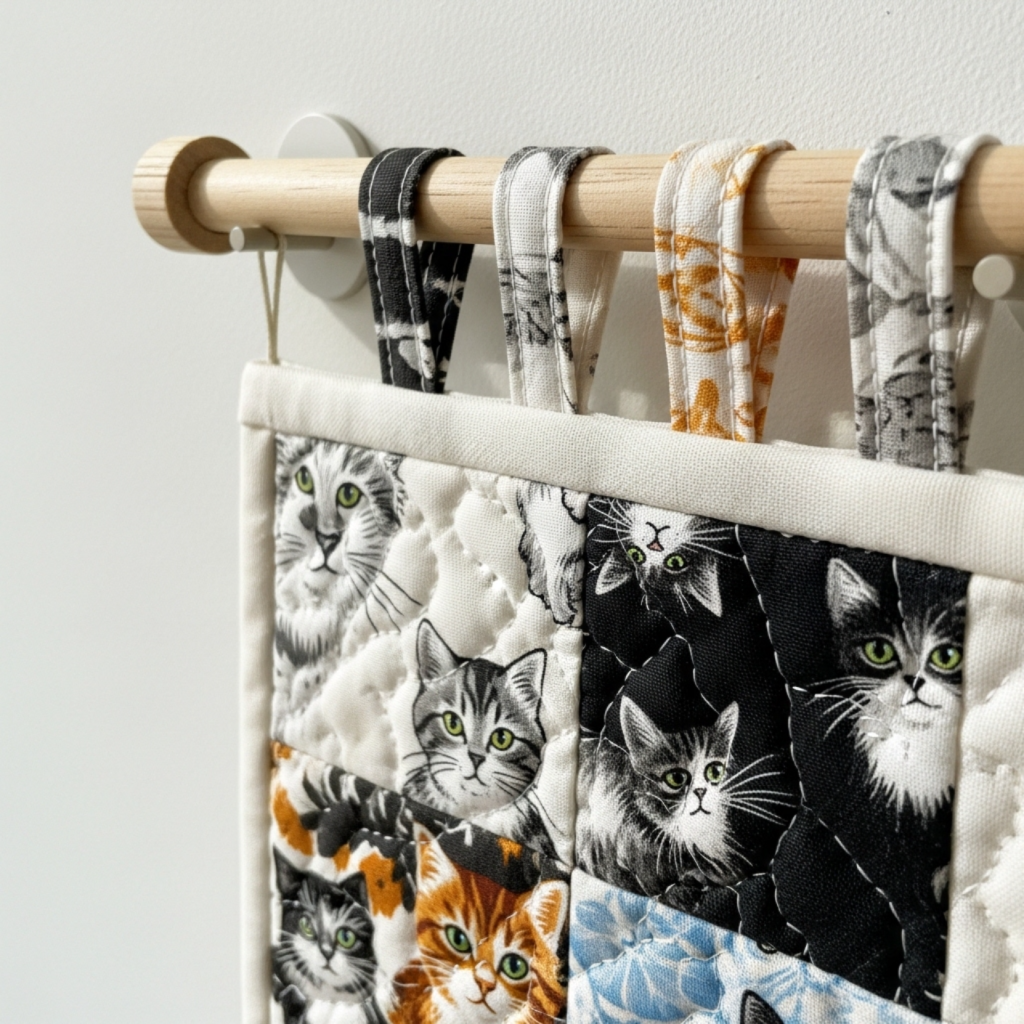
3. Visible Dowel and Fabric Loops
When you want the hardware to be part of the look, not hidden.
You sew fabric loops (or use ribbon, or even leather strips) along the top edge, then thread a pretty wooden dowel through them.
Make your loops at least 1.5 inches wide and space them no more than 10 inches apart so the top edge doesn’t droop between loops.
A natural wood dowel with little finials or knobs on the ends gives a rustic, farmhouse-cozy vibe that suits cat decor perfectly.
4. Decorative Clips and Quilt Clamps
The no-sewing-required favorite.
These are clamps or clips you screw into the wall in a straight line, then pinch the top edge of the quilt into them.
Wooden quilt hanger clamps look intentional and tidy. For a more casual look, even sturdy wooden clips or small clamps work for very light minis.
Space them evenly, roughly every 10 inches, so the weight is shared and the quilt hangs straight.
Best part: you can swap quilts in seconds. Great if you like rotating seasonal cat quilts.
5. Command Hooks and Thread Rings (No Holes)
Renting? Hate patching nail holes? This one’s for you.
Sew a few small plastic rings or thread loops onto the back top edge, then hang them on adhesive Command hooks.
It only works for genuinely lightweight mini quilts, but for a little 8 by 12 inch cat quilt, it’s perfect.
Zero damage to the wall and surprisingly secure.
| Method | Difficulty | Holes in wall? | Best for |
|---|---|---|---|
| Hanging sleeve | Moderate | Yes | A polished, gallery-quality finish |
| Corner pockets | Easy | Yes | Quick display of small minis |
| Visible dowel + loops | Easy | Yes | Rustic, decorative, hardware-as-style |
| Clips / quilt clamps | Very easy | Yes | Swapping quilts often |
| Command hooks + rings | Very easy | No | Renters and tiny lightweight quilts |
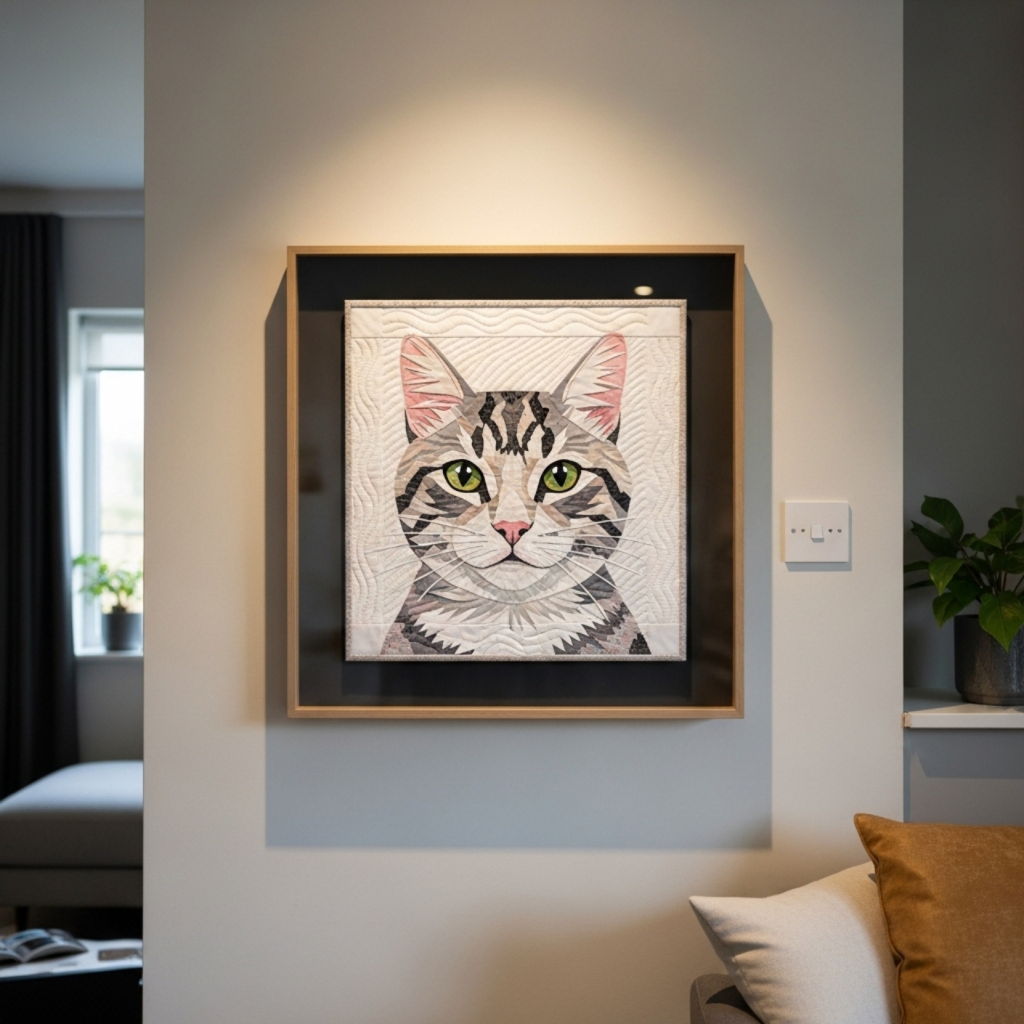
Framing a Cat Quilt as Art
Want it to look like a gallery piece? Frame it.
A floating frame (a deep shadow box style frame) lets you mount the quilt with a little space around it, glass optional. It instantly reads as “art” instead of “craft.”
For really tiny blocks, stretch the quilt over an artist’s canvas or a wooden frame and staple the edges around the back. Clean, modern, and it pops off the wall.
And for a single round motif, an embroidery hoop makes a charming, budget-friendly frame. Just trim the excess fabric at the back.
Framing also protects the quilt from dust and curious paws, which, let’s be honest, is a real concern in a cat household.
How to Size and Place It on Your Wall
A common mistake is hanging one tiny quilt alone on a giant wall. It looks lost.
Here’s the quick rule. Your wall art should fill roughly two-thirds to three-quarters of the open wall space or the width of the furniture below it.
If your mini is small, don’t stretch it to fit. Group it instead.
| Spot | What works |
|---|---|
| Above a sofa or bed | A row of 2 to 3 minis, or one larger wall hanging |
| Narrow wall or between windows | A single vertical mini quilt |
| Hallway or stairwell | A gallery cluster of small cat blocks |
| Reading nook or shelf styling | One small framed mini leaning or hung |
Hang the center of your piece at about 57 to 60 inches from the floor. That’s standard eye level, the same height galleries use.
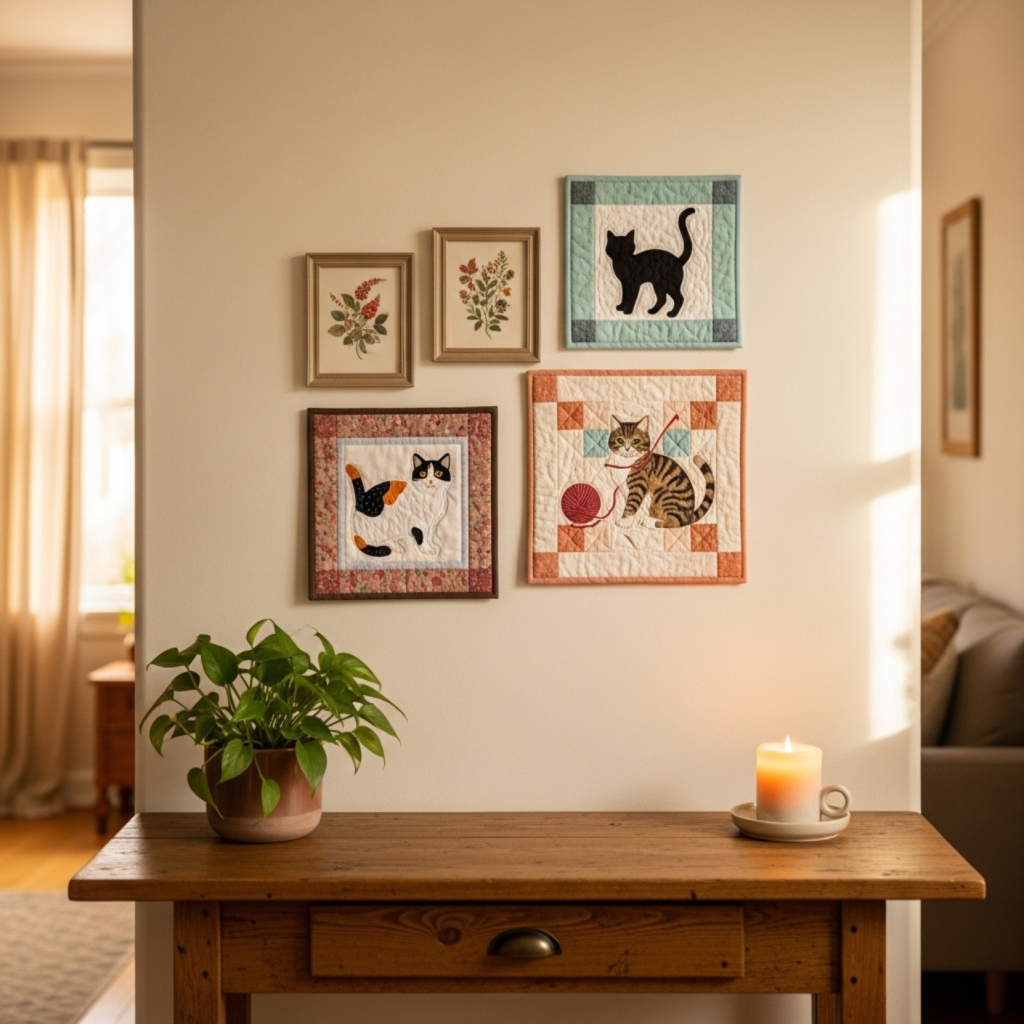
Decor Ideas That Actually Look Good
A few ways to style cat quilt wall hangings so they feel designed, not random.
Make a gallery wall. Cluster three or four small cat minis with a couple of framed prints or photos. Mix sizes for a collected, cozy look.
Swap them seasonally. A black cat moon quilt in October, a heart-themed kitty quilt in February. The clip method makes this a two-minute job.
Match your color story. Pull one or two colors from the quilt and echo them in nearby pillows or decor so it feels tied to the room.
Layer it. Lean a small framed mini on a shelf in front of a larger one for depth. Designers do this with art all the time.
The Perfect Starter Wall Hanging
If you don’t have a mini quilt yet and want one made specifically to hang, start small and high-impact.
The Black Cat Moon Mini Quilt is the ideal first project. It’s a simple 8 by 12 inch black cat silhouette against a full moon, and it’s a great beginner introduction to Foundation Paper Piecing.
Small project, boutique-shop result. You can frame it, hang it from a dowel, or gift it.
It’s pattern number eight in our roundup of beginner-friendly cat quilt patterns, along with nine other designs worth hanging on a wall.
Keeping It Hanging Flat and Clean
A few quick care notes so your wall hanging stays looking sharp.
Use that bottom dowel or bottom corner pockets to add a little weight. Gravity keeps the quilt flat and stops the corners from curling toward you.
Keep it out of direct sunlight if you can. Constant sun fades fabric over months, and you didn’t piece all those cats just to watch them go pale.
Give it a gentle shake or a low-suction vacuum with a brush attachment every so often to keep dust (and cat hair, the eternal enemy) from settling in.
Final Thoughts
A mini cat quilt belongs on the wall, not in a drawer.
Pick the hanging method that matches your wall and your patience level. A hidden sleeve for the polished look, corner pockets or clips for fast and easy, a frame if you want it to read as fine art.
Then size it right, place it at eye level, and let those little cat faces brighten up your space.
Your cats will pretend not to notice. They’ll notice.