GigaPaw.com participates in affiliate programs including Amazon Associates. We earn from qualifying purchases. Content is for informational purposes only—consult a licensed veterinarian for pet medical advice.
5 DIY Cat Bridge Ideas You Can Build Without Fancy Tools
So you’ve got a cat that thinks gravity is optional. Instead of buying overpriced shelves, why not build a bridge?
These DIY cat bridge ideas are simple, budget-friendly, and don’t need any special tools. If you can handle a screwdriver and some rope, you’re good to go.
Your cat gets a skywalk, and you get bragging rights.
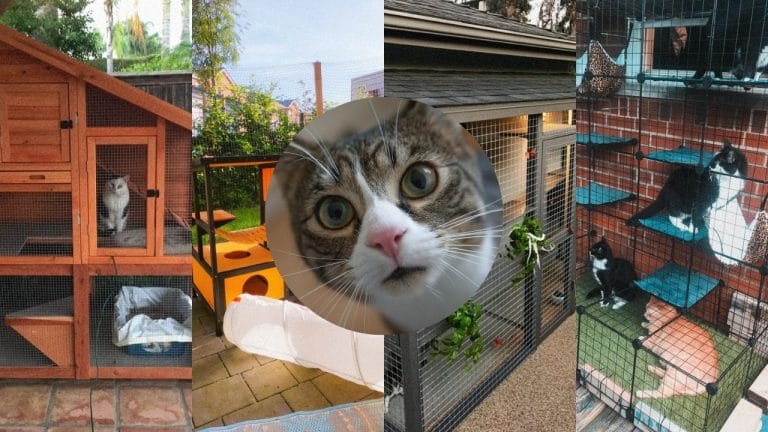
And if your indoor cat is climbing curtains or shredding the couch, that’s not bad behavior. That’s a bored cat begging for vertical territory. Bridges are one of the cheapest fixes for it.
Which DIY Cat Bridge Should You Build?
Quick comparison so you can pick the right bridge for your skill level, budget, space, and rental situation.
| Bridge Style | Skill | Cost | Time | Renter-Friendly | Best For |
|---|---|---|---|---|---|
| 1. Rope-and-Board | Beginner | $20-30 | 2 hours | No | First-timers, classic look |
| 2. Shelf-to-Shelf | Beginner | $10-15 | 1 hour | Maybe | Reusing existing shelves |
| 3. Old Belt + Wood | Easy | $5-10 | 1 hour | Yes | Rustic decor, upcyclers |
| 4. Fabric Hammock | Easy | $10-20 | 1-2 hours | Yes | Renters, nap-loving cats |
| 5. Tree Branch | Beginner | Free-$10 | 2 hours | No | Outdoor-loving climbers |
Renting? Read This First
Most cat bridges need wall brackets, which means screws and patched holes when you move out. Good news: you can absolutely build one without losing your security deposit.
The fabric hammock (#4) and the old belt bridge (#3) are the lowest-damage options. Both can hang from small picture-hanging hooks or heavy-duty adhesive strips rated for 5 to 10 pounds.
If you do drill, use the smallest anchors possible and keep a tube of spackle ready. A nail hole patches in five minutes. Most landlords never notice.
5 DIY Cat Bridge Ideas
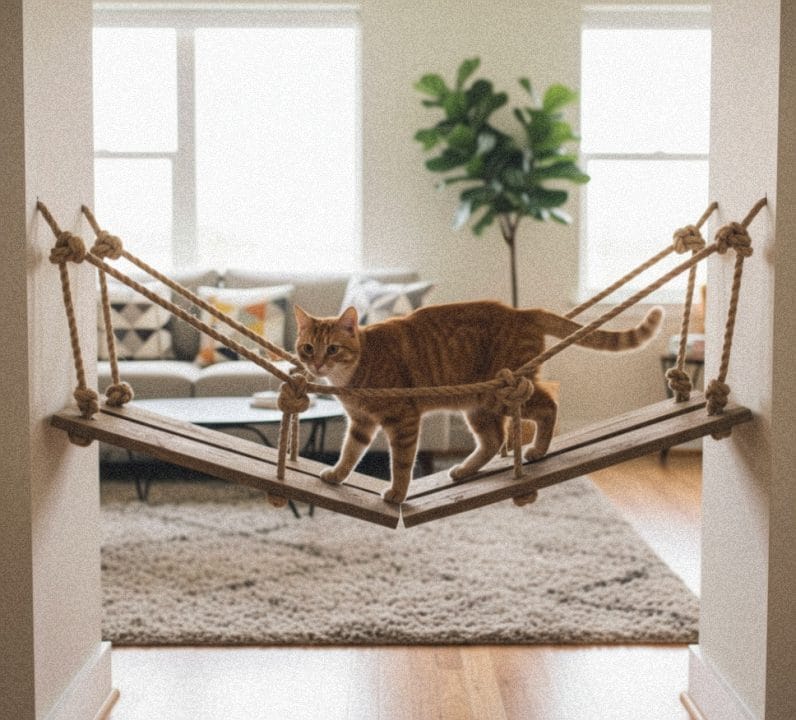
1. Rope-and-Board Jungle Walk
Intro
This one’s like a mini suspension bridge for your cat. It’s flexible, fun, and gives them that explorer vibe.
Materials Needed
- 2 strong wooden boards (around 2 to 3 feet long)
- Thick rope (cotton or nylon, safe for cats)
- Screws and screwdriver
- Wall brackets
Making Process
- Mount the brackets on two walls opposite each other.
- Lay the boards on the brackets as walking planks.
- Drill holes on both sides of the boards. Thread the rope through them to create “railings.”
- Knot the rope tightly so it doesn’t slip.
- Test the bridge for strength before letting your cat climb.
This bridge sways a little, which cats love because it mimics tree branches.
Why your cat will use it: The slight sway feels like a real branch in the wind. High-energy cats and climbers gravitate to anything that moves a little under their paws.
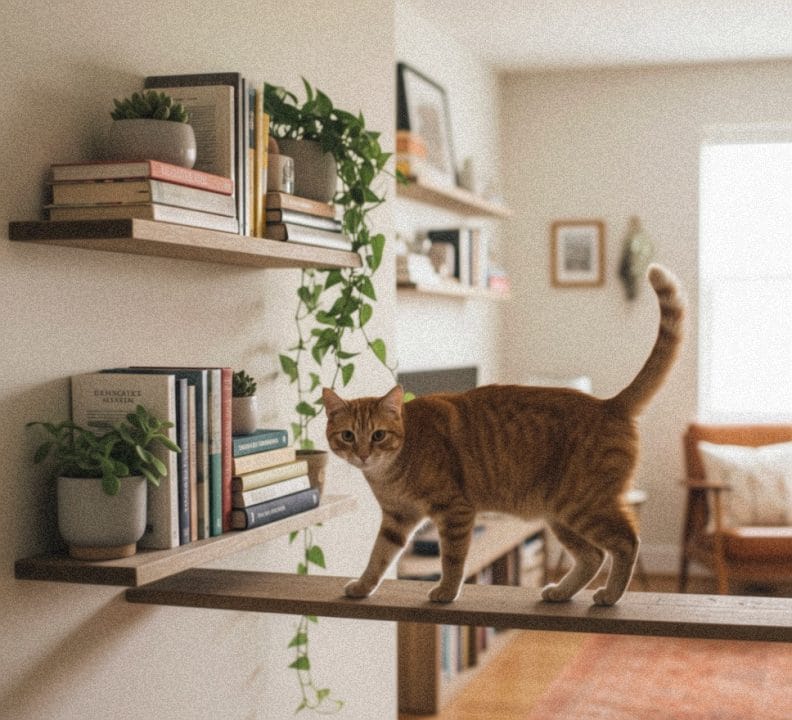
2. Shelf-to-Shelf Cat Bridge
If you already have wall shelves for books or décor, this idea connects them into a continuous playground.
Materials Needed
- 2 existing wall shelves
- 1 wooden plank (to act as the bridge)
- L-brackets
- Screws
Making Process
- Pick two shelves with enough space between them.
- Cut a plank to fit the gap.
- Use L-brackets to secure the plank to both shelves.
- Sand the plank edges to avoid splinters.
- Add a bit of carpet or non-slip fabric on top so your cat doesn’t skid.
This bridge blends into your room without looking out of place.
Why your cat will use it: It connects two perches your cat already uses into one route, so they don’t have to jump down and back up to switch spots.
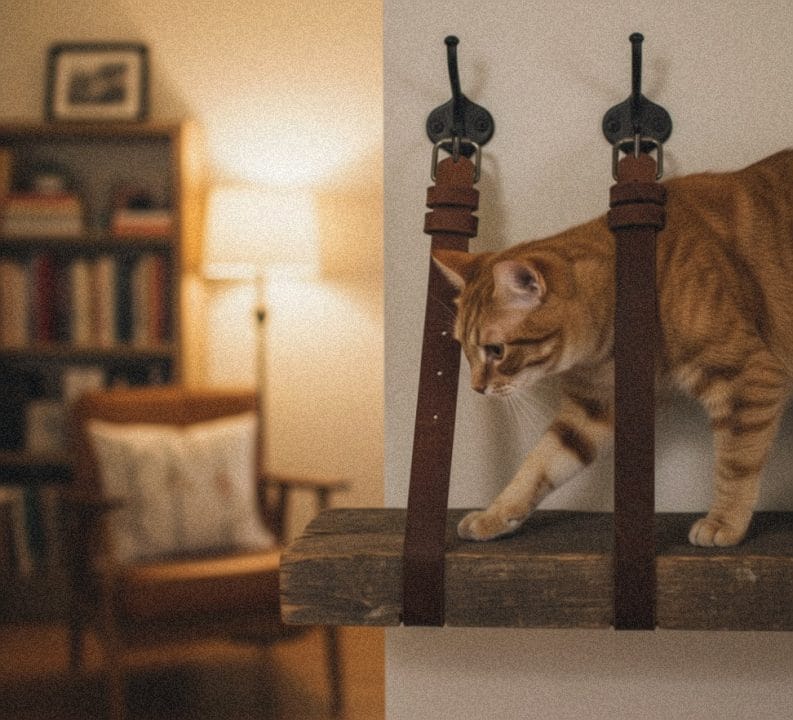
3. Old Belt and Wood Bridge
Got some old belts lying around? Turn them into stylish straps to hold up a wooden walkway.
Materials Needed
- 2 to 3 old leather belts
- 1 flat wooden plank
- Screws and screwdriver
- Wall hooks or brackets
Making Process
- Mount hooks or brackets on the wall.
- Loop the belts through the plank ends to act as hanging straps.
- Secure the belts tightly onto the hooks.
- Adjust the height and angle until the plank is steady.
- Check that the bridge holds weight before your cat tries it.
This one looks rustic and unique, like furniture made on purpose.
Why your cat will use it: The leather strap softens the visual line and the rustic build looks like furniture, so even hesitant cats approach it as part of the room.
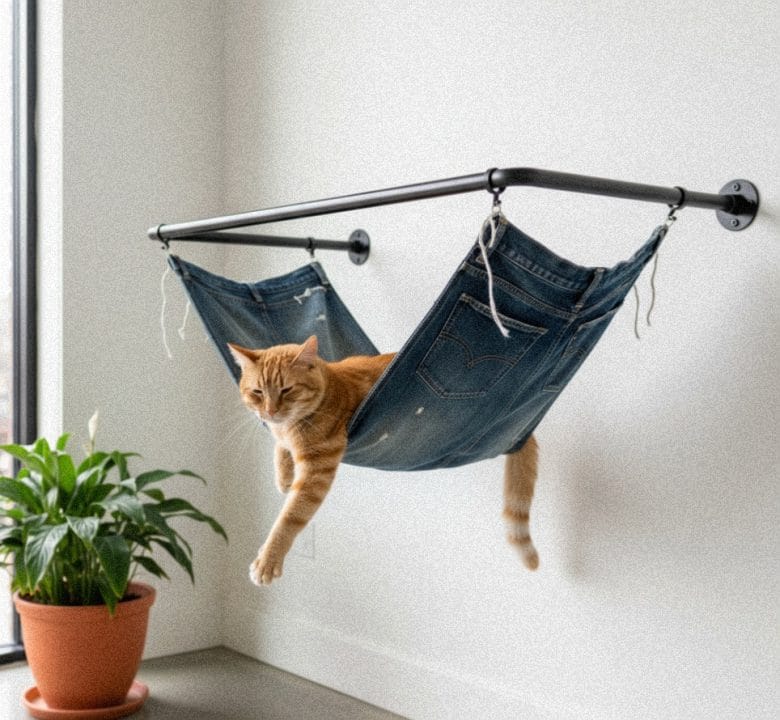
4. Fabric Hammock Bridge
Not all bridges have to be wood. A fabric sling can work as a comfy walkway for adventurous cats.
Materials Needed
- Strong canvas or denim fabric
- 2 curtain rods or dowels
- Screws and wall mounts
- Needle and thread or fabric glue
Making Process
- Cut a long strip of fabric wide enough for your cat.
- Sew or glue loops at each end. Slide the curtain rods through.
- Mount the rods onto the wall using brackets.
- Make sure the fabric hangs tight but with a little sag.
- Place it low at first so your cat gains confidence.
Cats that love hammocks will adore this one.
Why your cat will use it: Cats that already nap on hammocks treat this as a hybrid bed and walkway. Most curl up in the middle within a week.
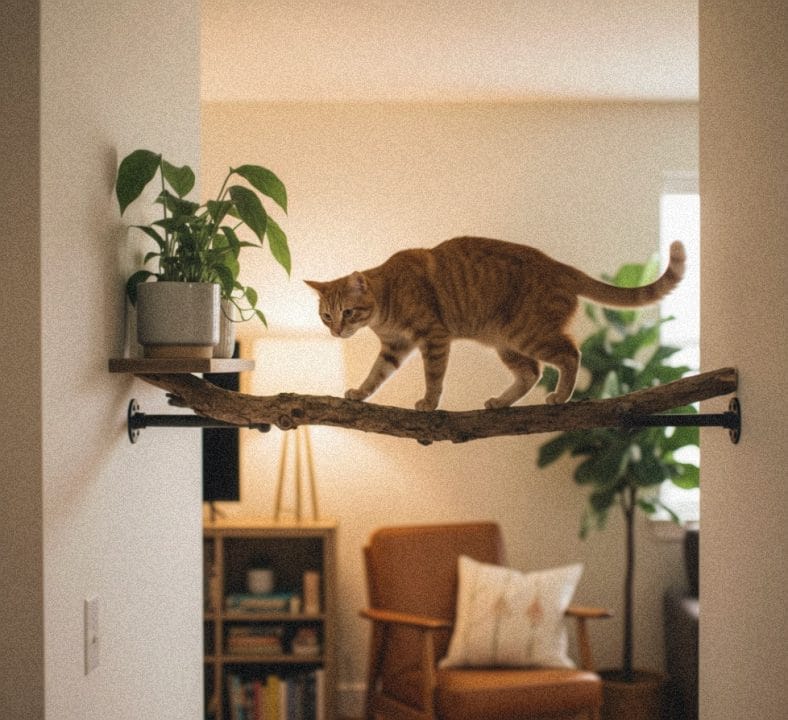
5. Tree Branch Bridge
Bring a touch of the outdoors inside with a natural branch bridge. It’s eco-friendly and has that forest vibe.
Materials Needed
- One sturdy, straight tree branch
- Sandpaper
- Screws and wall brackets
- Non-toxic wood finish (optional)
Making Process
- Find a dry branch that’s thick enough to hold weight.
- Sand it down to remove rough edges.
- Mount brackets on the wall and secure the branch on them.
- Add two or three branches at different heights for variety.
- Test stability before your cat takes the first walk.
This bridge gives a natural climbing feel, perfect for adventurous cats.
Why your cat will use it: Real bark grips like nothing manufactured, and the smell of natural wood pulls in cats with strong outdoor instincts.
Upcycle Version of Every Design
You don’t need a single new piece of lumber to build any of these. Every design has a junk-drawer or curbside-find version that costs almost nothing.
- Rope-and-Board: Use a leftover fence picket, an old shelf, or a sanded-down skateboard deck instead of new wood. Replace fresh rope with an old climbing rope, retired dog leash, or thick braided cotton from a thrift store.
- Shelf-to-Shelf: Cut a plank from a broken Ikea shelf, a wire closet shelf with a board on top, or even a thick wooden cutting board you no longer use.
- Old Belt + Wood: The whole design is already upcycled. Bonus: swap the wall hooks for repurposed coat hooks or curtain rod brackets you already took down.
- Fabric Hammock: Cut from old jeans, a denim tote, retired curtains, or canvas from a worn-out duffle bag. Use broomstick handles in place of new dowels.
- Tree Branch: Already free if you can take a walk. After a windy night, neighborhood streets are full of strong, dry branches that work after a quick sand-down.
Total cost for any of these upcycle versions can land under ten dollars, sometimes zero. Your cat doesn’t care that the wood is new. Neither should you.